Excel Import in SignStudio Advanced (SSA)
Use Excel import to save time when creating many sequential signs. In this guide, we explain how to import signs from spreadsheets – either with text only or with advanced layouts and images.
1. Log in and open SSA
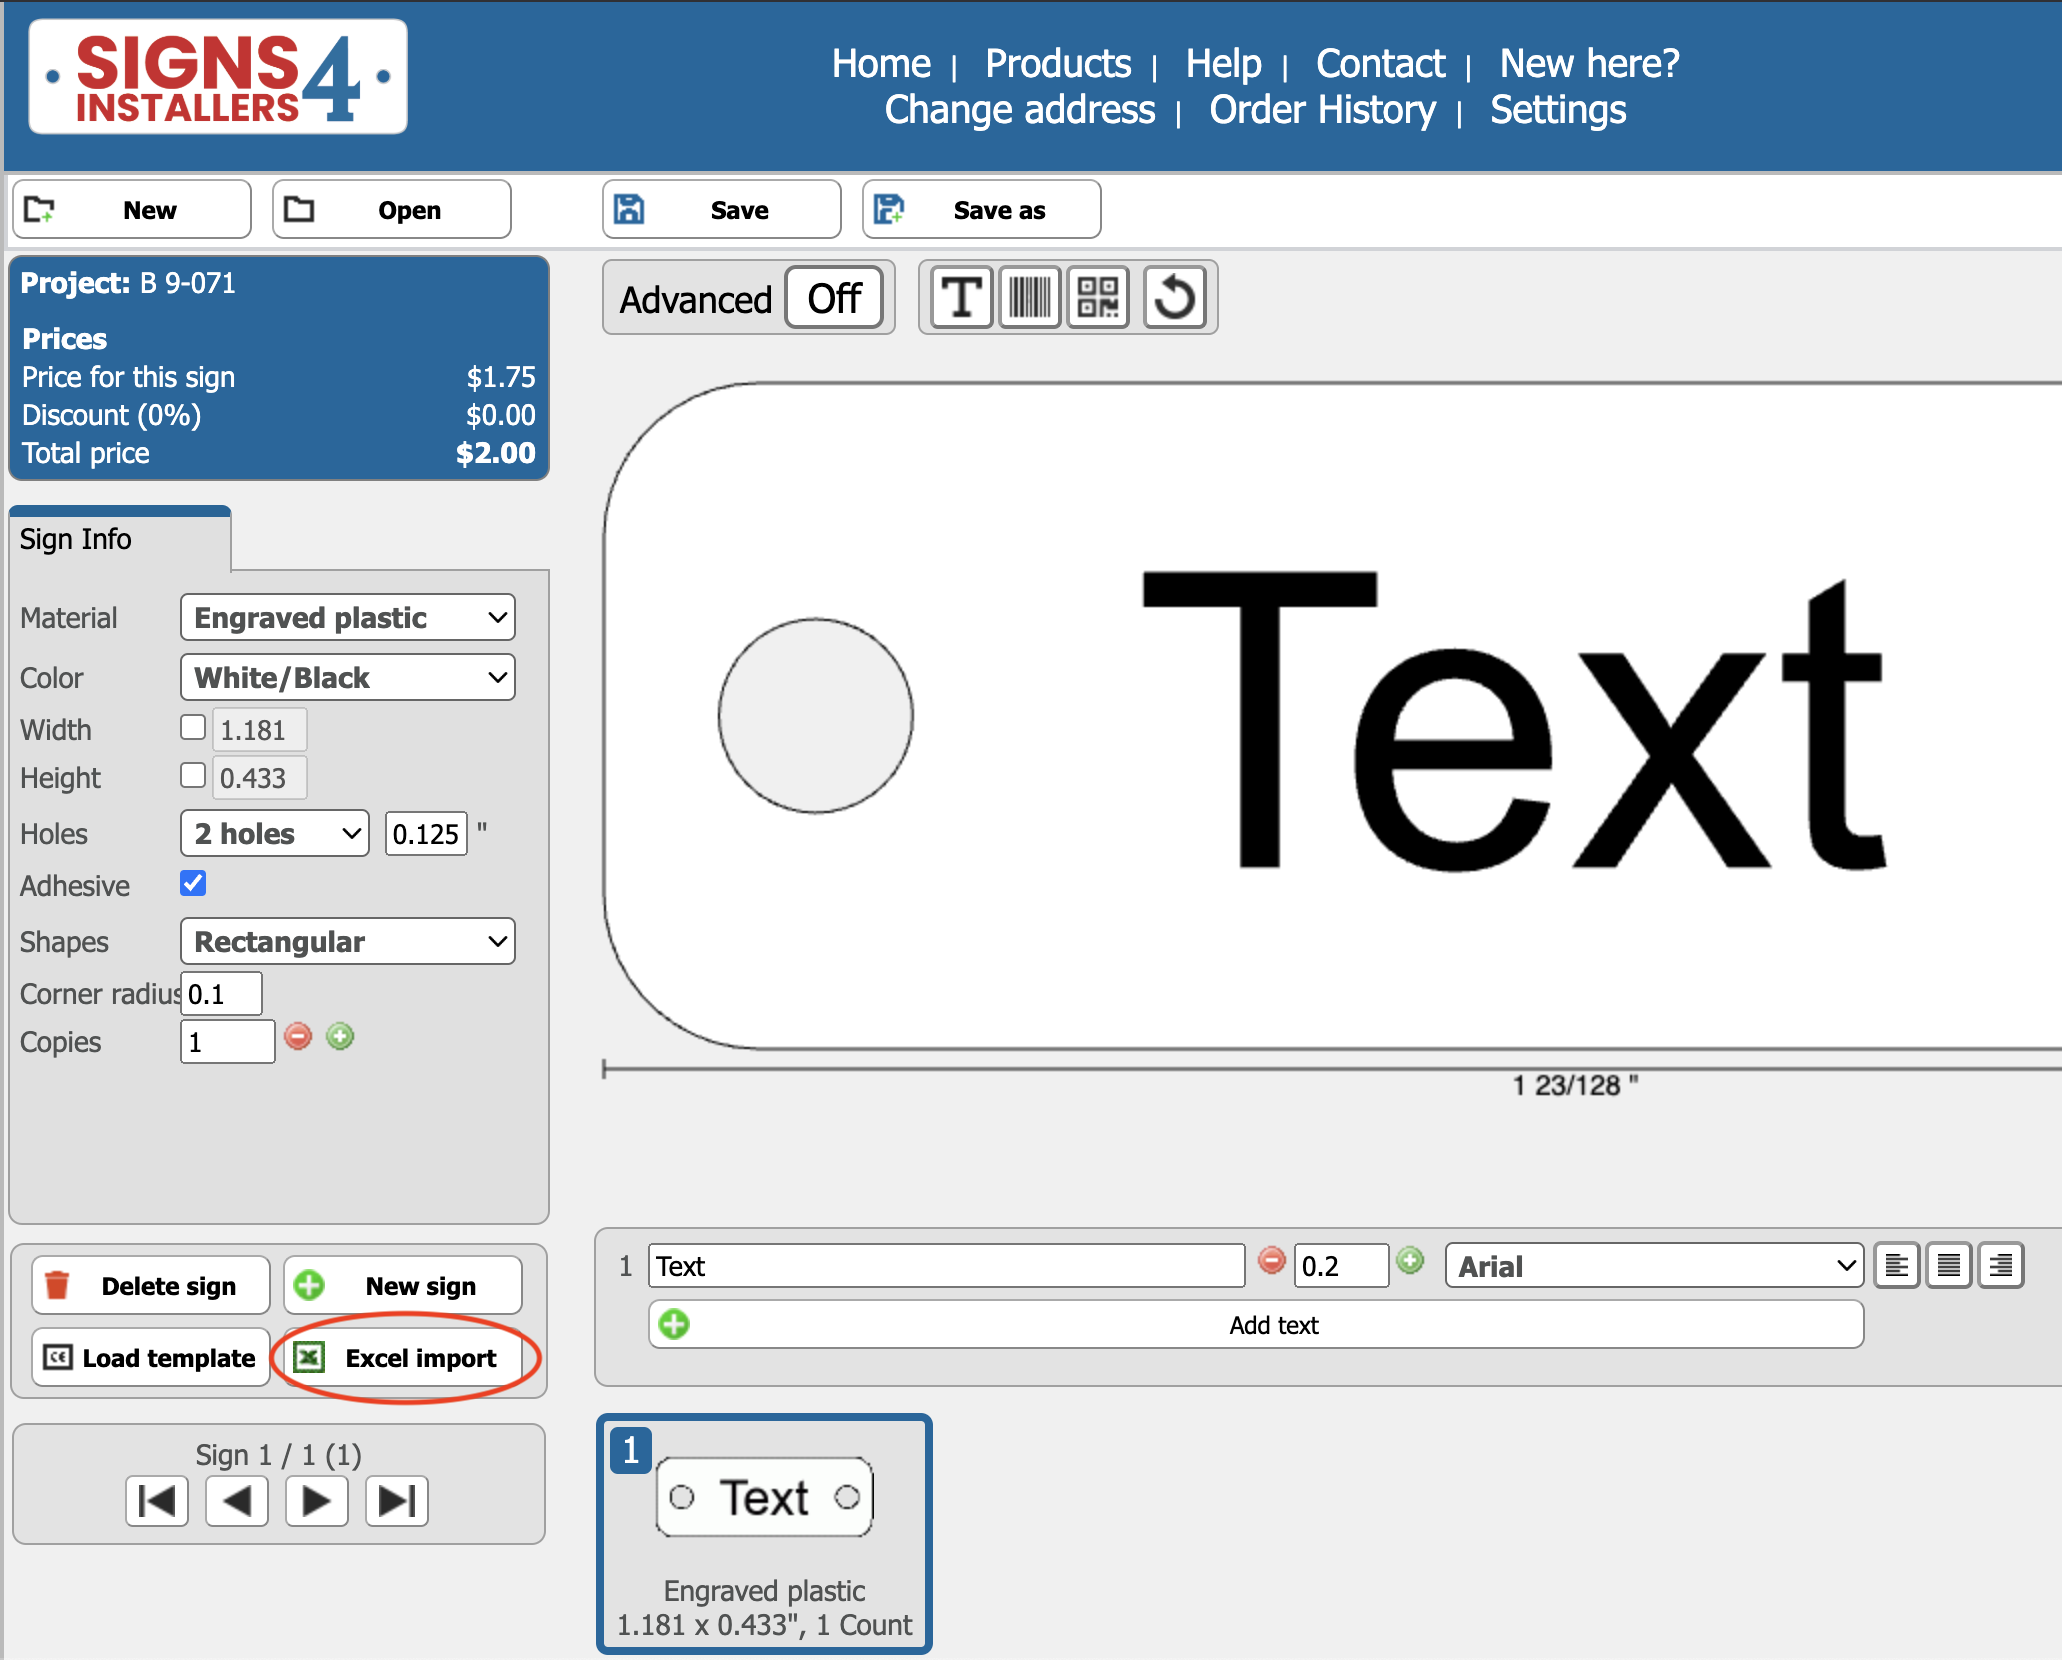
Log in and open the order tool (SSA). Then click the Excel import button on the lower left hand side of the tool.
2. Prepare your file: text only
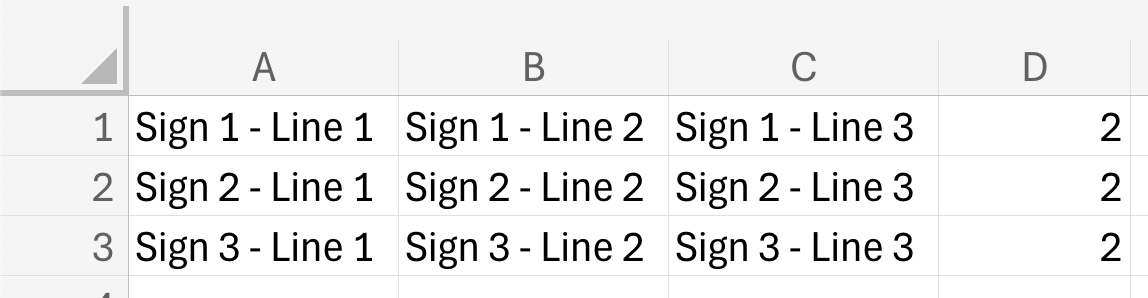
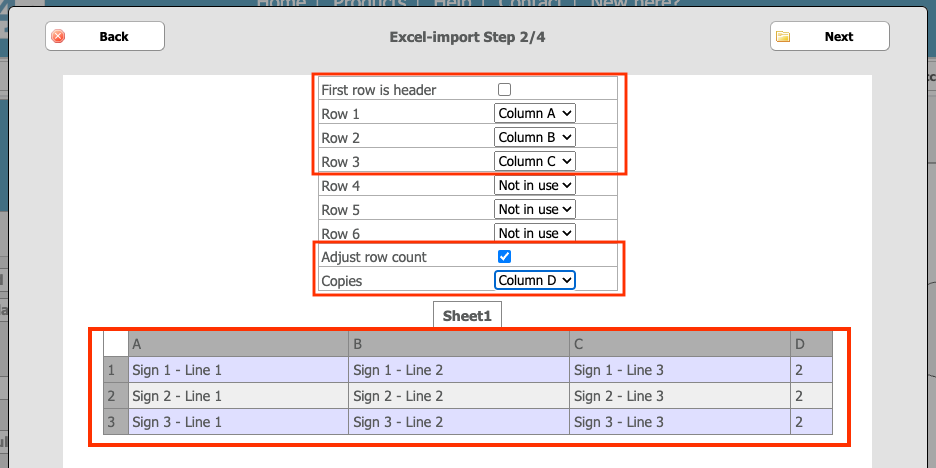
Prepare an Excel/Sheets file in the format .ods or .xls (not .xlsx). The spreadsheet must have a specific structure for the import to work. Each row = a new sign. Each column = a new line of text.
If you want several copies of the same sign, enter the number in a separate column, preferably the one on the far right.
Example: Refer to the attached image to see how to create 3 different signs, each with 3 lines of text, in 2 copies each.


3. Prepare your file: with images
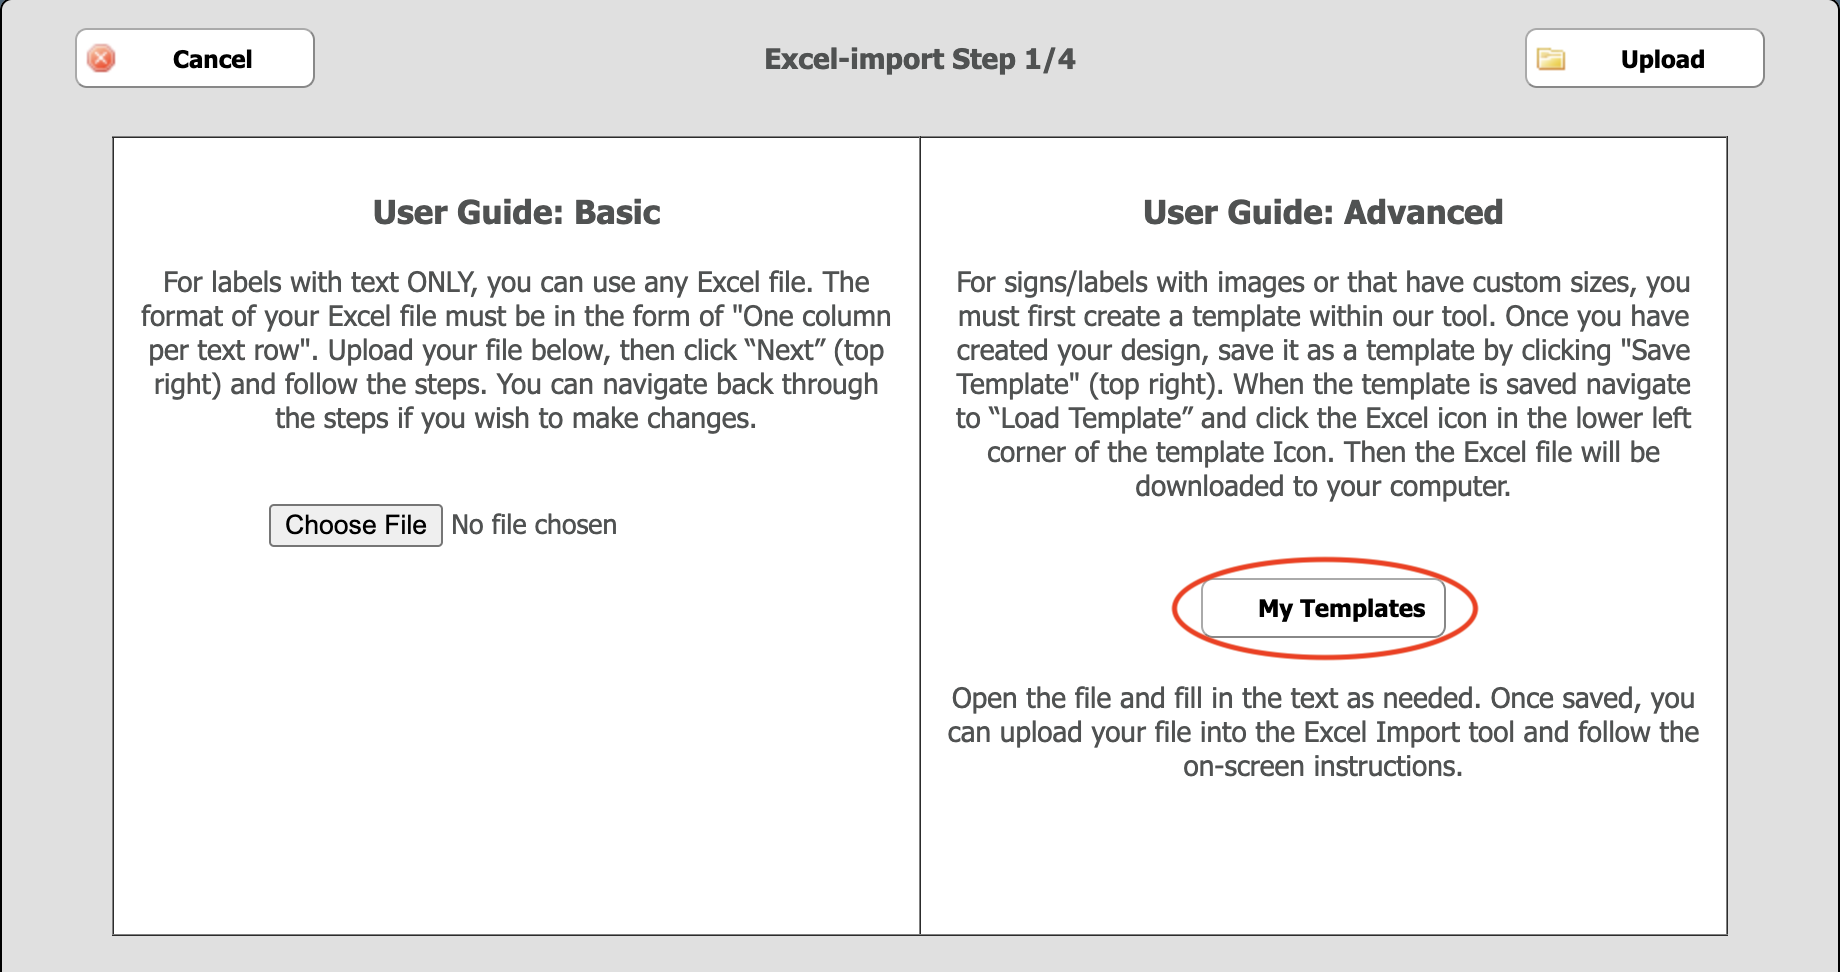
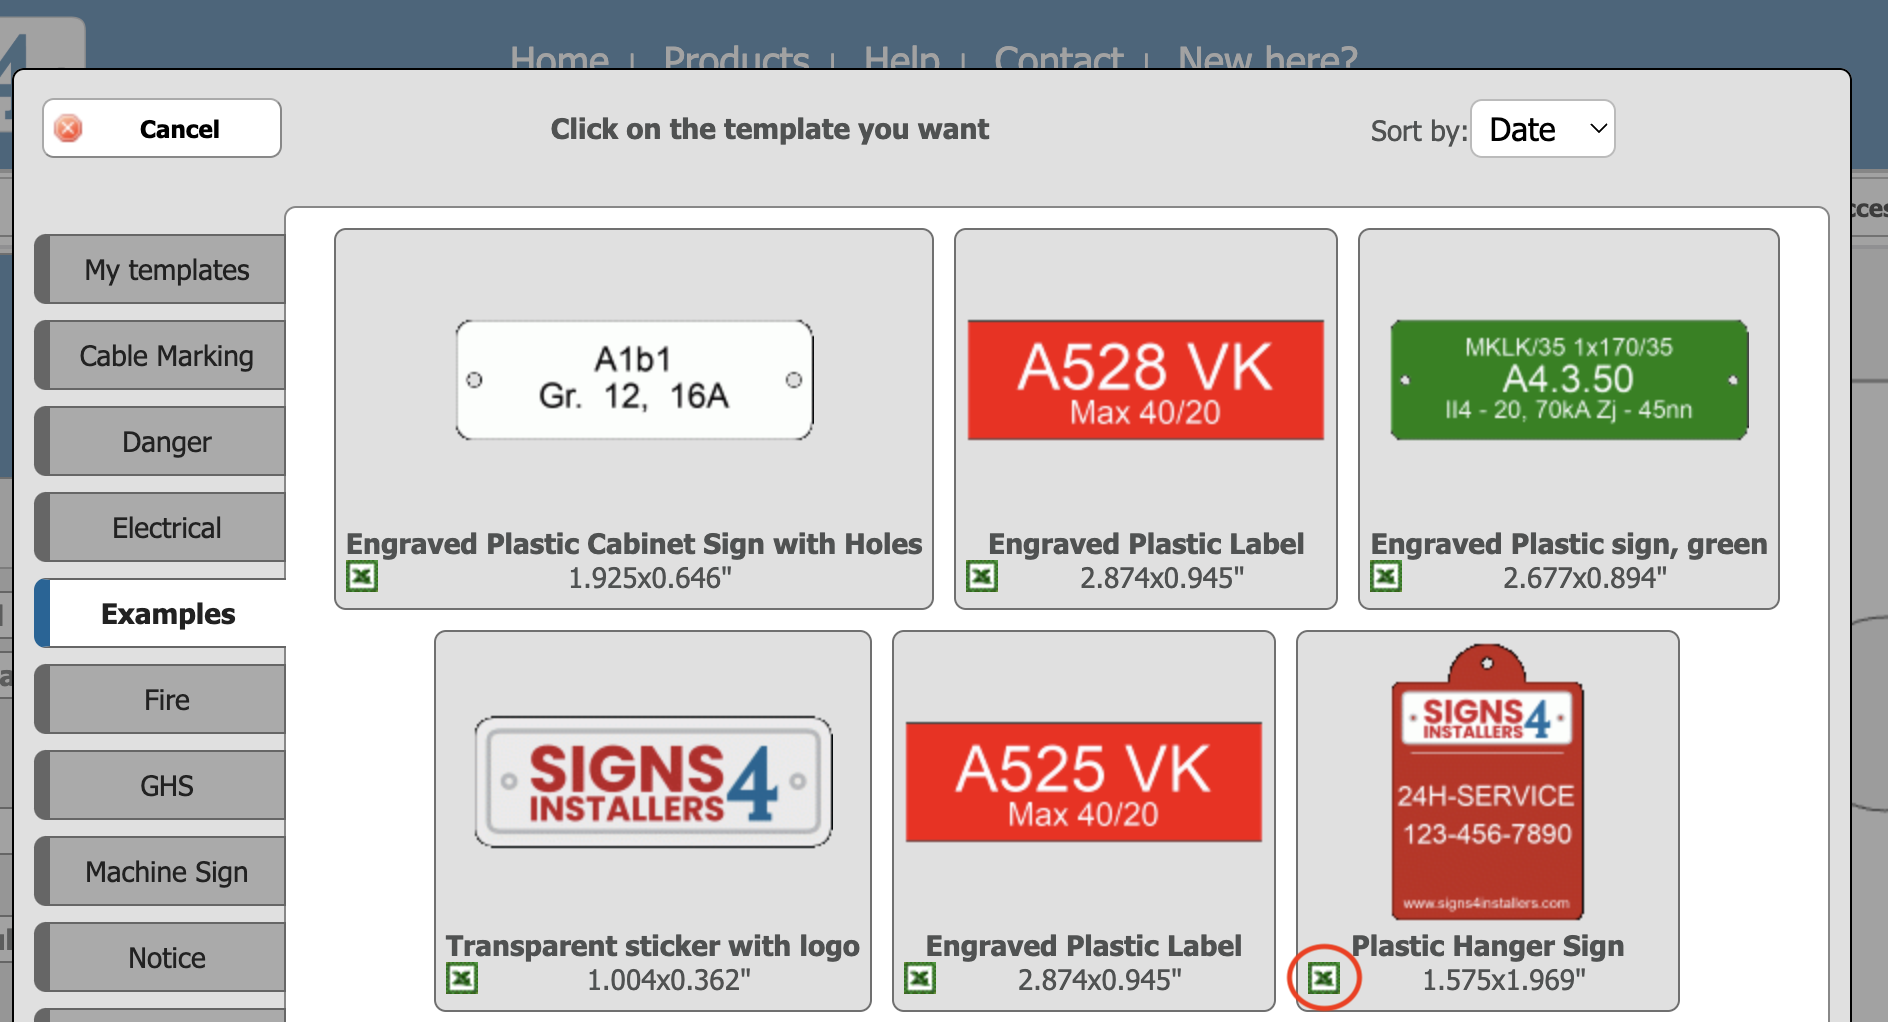
Click on Load template to load your sign that you want to make a series of. Here you can choose your own templates that you have saved yourself, which you can learn how to do in tutorial 6.
Download the template by clicking on the Excel logo in the bottom left corner of the template. Then open the file in Excel (or any similar application) and edit the text, just like in step 2.
Important to know: You can skip steps 5 and 6 if you use a template.
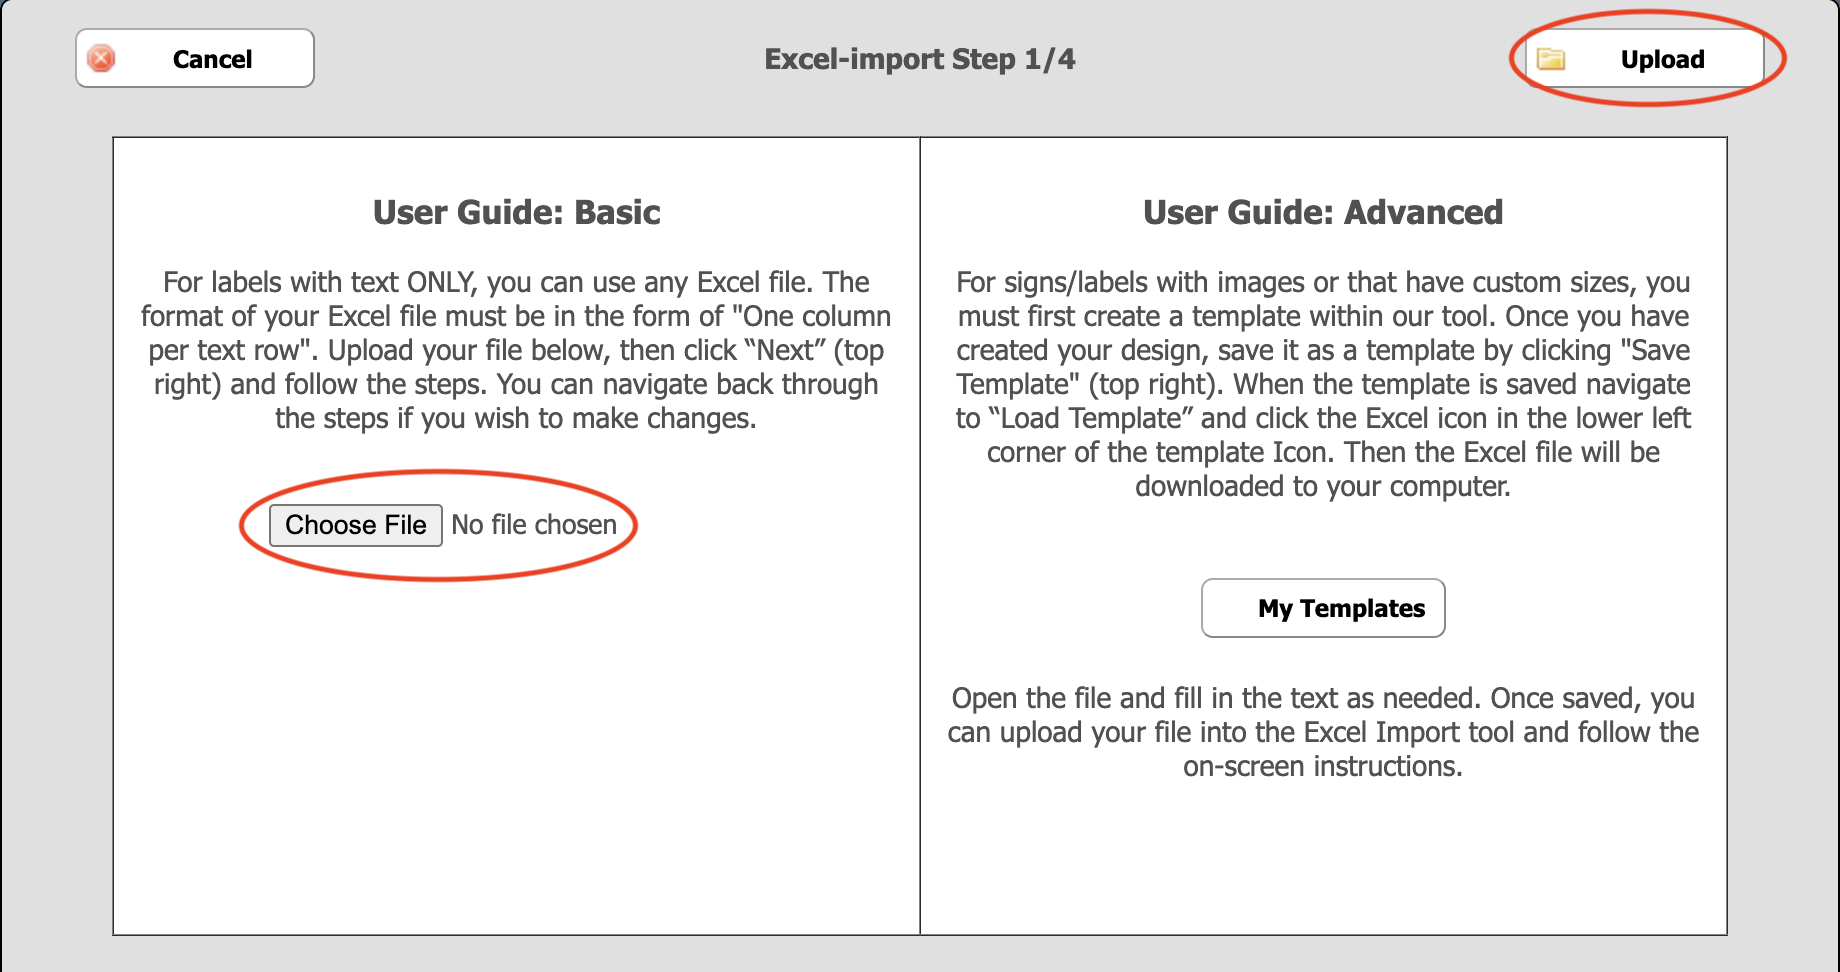
4. Upload your file
Click Choose file in the Excel import function, find the file on your computer, click Open, and then click Upload.
5. Select relevant text
For the second import step, select the text from the spreadsheet that should be visible on the signs. All columns that are highlighted in the box below will be imported into the next step. Usually you select column A as Row 1, column B as Row 2, and so on. If a column should not be included, select Not in use.
Does the spreadsheet include a row consisting of headings only? If so, tick the box next to First row is header. These will then not appear when the import is complete.
If you specified the number of copies in the spreadsheet, select the relevant column next to Copies.
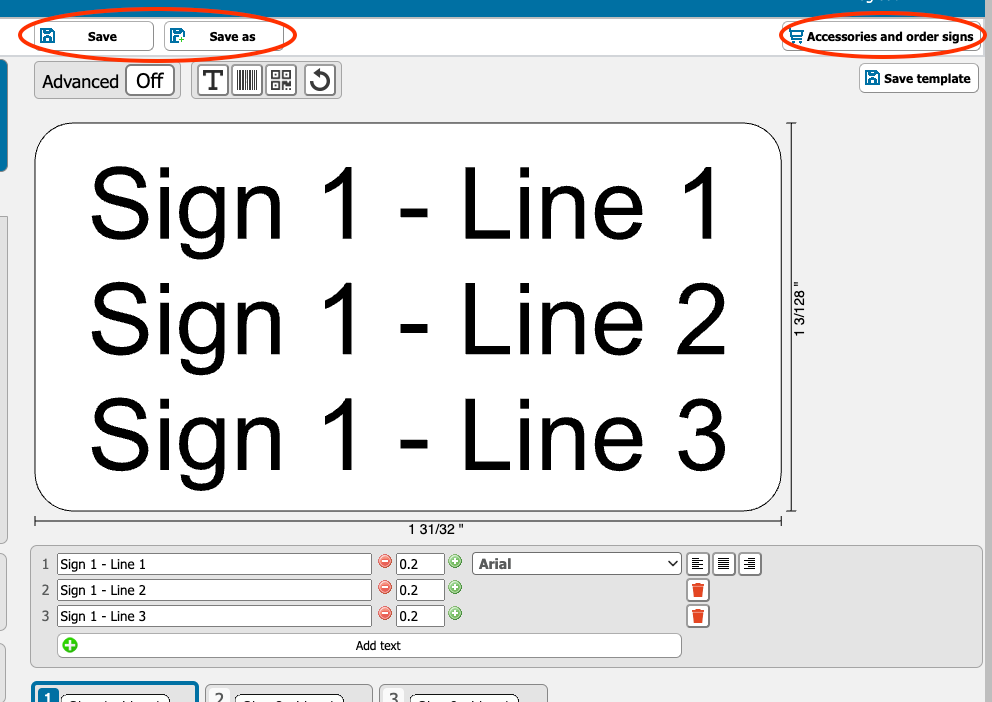
6. Choose materials and appearance
Now you can modify the appearance of all imported signs, such as colour, text size and material (if needed).
If you see the text All signs cannot be imported, it means that the text does not fit in the sign. You will need to either make the text smaller or the sign larger. When you are satisfied, click Next and Finish.

7. Double check, save and order
Review your signs to make sure they look right and make any changes if necessary. Then save the project and order as usual. The signs are typically produced and dispatched on the same day (depending on cut-off time for each material) for next working day delivery, while the invoice is sent separately within two weeks.
Tip!
Make several Excel imports into the same project, perhaps from different sheets in your spreadsheet? That way we can easily send everything in one package while you minimise shipping costs.